Map the movie data in to a Graph.
The one and only data structure used Jaseci is Graph. So first let's map the movie script in to a graph. Movie script is saved in a json file, and the basic structure of the movie script is as follows;
1. Exploring the data
{"scene_1 name" : ["scene_1 description", {"actor_1 name": "[actor_1 dialodues]", "actor_2 name": "[actor_2 dilogue]"}],

"scene_2 name": "scene_2 description",
}
Sample from the movie script;
{
    "1 EXT. PUENTE ANTIGUO, NEW MEXICO - NIGHT 1": "A main street extends before us in this one-horse town, set amid endless flat, arid scrubland. A large SUV slowly moves down the street and heads out of town.",
    "2 EXT. SUV - NIGHT 2": [
        "The SUV sits parked in the desert. Suddenly, the roof panels of the SUV FOLD OPEN. The underside of the panels house a variety of hand-built ASTRONOMICAL DEVICES, which now point at the sky. JANE FOSTER (late 20's) pops her head through the roof. She positions a MAGNETOMETER, so its monitor calibrates with the constellations above. It appears to be cobbled together from spare parts of other devices.",
        {
            "JANE": [
                "Hurry! We hear a loud BANG followed by muffled CURSING from below. Jane offers a hand down to ERIK SELVIG (60) who emerges as well, rubbing his head. JANE (CONT'D) Oh-- watch your head.",
                "It's a little different each time. Once it looked like, I don't know, melted stars, pooling in a corner of the sky. But last week it was a rolling rainbow ribbon--",
            ],
            "SELVIG": [
                "Thanks. So what's this anomaly of yours supposed to look like?",
                "(GENTLY TEASING) Racing round Orion? I've always said you should have been a poet. Jane reigns in her excitement. She tries for dignity. 4th BLUE REVISIONS 03-26-10 1A.",
                "(re: the gloves) I recognize those. Think how proud he'd be to see you now. Jane's grin fades to a sad smile.",
                "For what?"
            ]
        }
    ],
    "3 INT. SUV - NIGHT 3": [
        "The SUV is bathed in the glow of high-tech monitoring equipment and laptops, some looking like they're held together with duct tape. Jane opens a well-worn NOTEBOOK of handwritten notes and calculations. Selvig watches the frustrated Jane with sympathy.",
        {
            "JANE": [
                "The anomalies are always precipitated by geomagnetic storms. She shows him a complicated CHART she's drawn in the book, tracking occurrences and patterns. I just don't understand. Something catches Darcy's eye out the driver's side mirror. She adjusts it. In the distance",
            ],
            "DARCY": [
                "Jane? Jane SHUSHES her, leafs through her notes. The bottle of champagne begins to vibrate.",
                "The champagne bottle starts to RATTLE noisily now as it shakes more violently, pressure building up inside it, when the cork EXPLODES out of it. Champagne goes spewing everywhere -- over equipment, over Jane. DARCY (CONT'D) Jane?",
            ],
            "SELVIG": [
                "That's your subtle aurora?!"
            ]
        }
    ],
    "4 EXT. DESERT - MOMENTS LATER 4": "The roof panels still open, the SUV races towards the strange event, Jane, amazed by the sight, stands with half her body out the roof, taking video of the light storm before them. The SUV hits a bump. Jane nearly flies out. Selvig grabs her, yanks her back in.",
    "5 INT. SUV 5": [
        "Jane grins, thrilled, pumped with adrenaline.",
        {
            "JANE": [
                "Isn't this great?! A thought strikes her. JANE (CONT'D) You're seeing it too, right? I'm not crazy?"
            ],
            "SELVIG": [
                "That's debateable. Put your seat belt on! 4th BLUE REVISIONS 03-26-10 3A. The SUV lurches."
            ]
        }
    ]
}
2. Creating nodes
So, lets dive into the code;
first we will need to have two types of nodes in this graph, scenes and actors in addition to root node. lets define those nodes in jac.
node root;

node scene{
    has name;
    has description;
}

node actor{
    has name;
    has dialogue;
}
As you can see in the above code the scene type nodes has two variable called name and description. we can declare variables in jac with the has key word. Similarly the actor type nodes has two variables called name and dialogue. now let's build the graph by connecting these nodes by edges and assigning variables to them.
3. Building the initial graph
To build the graph we are creating the build_graph walker. To get more clear picture about Jaseci walkers and for some example programs using walkers concept go to here.
walker build_graph{

    can file.load_json;

    #loading the movie data to the movie variable.
    has movie = file.load_json("movie_data.json");

    #looping through movie dictionary.
    for movie_scene in movie {
        scene_name = movie_scene;
        content = movie[movie_scene];

        if content.type == str:
            description = content;
            scene = spawn here ++> node::scene(name=scene_name, description=description);

        if content.type == list:
            if content[0].type == str:
                description = content[0];
            scene = spawn here ++> node::scene(name=scene_name, description=description);

            if content[1].type == dict:
                for actor in content[1]{
                    name = actor;
                    dialogue = content[1][actor];
                        spawn scene ++>node::actor(name=name, dialogue=dialogue);
                    }
        }
}
In the above block;
file.load_jsonaction is using to load thejsonfile from the local directory. here the name of thejsonfile ismovie_data.json.- In the line starts with
has movie, assigns the movie data to themovievariable. - Here, the
movie_datais a dictionary object that includes details on the movie scenes in each entry. - I won't go into great detail on "for" and "if" syntax in Jaseci because it just like other programming languages do.
scene = spawn here ++> node::scene(name=scene_name, description=description);line is to spawn the scene node from the root node. In this code theherekey word refers to the node we are currently in, in this case we are currently in the root node. And while spawning the scene nodes we are setting variablesnameanddescription.spawn scene ++>node::actor(name=name, dialogue=dialogue);line is o spawn the actor nodes from scene code. Similar to above this node also assigning values to variablesnameanddialogue.
Now lets setup init walker to wrap these lines of code together.
walker init{
    root{
         spawn here walker::build_graph;
    }
}
Save all these code in a file and name it to movie.jac. To run this code in jsctl run
jac run movie.jac
If everything is fine then you will see the output as follows;
jaseci > jac run movie.jac
{
  "success": true,
  "report": [],
  "final_node": "urn:uuid:1c75b708-06ed-45a8-a2ee-88a94a3c33da",
  "yielded": false
}
To view the graph structure in terminal you can run
jac dot movie.jac
Since the graph is more complicated and huge you won't be able to illustrate the final look of the graph in the terminal. So, We are going to open the graph in Jaseci Studio in next steps.
4. Bringing the graph into Jaseci Studio
First let's build the jac program we created with following command.
jac build movie.jac
If the aforementioned command was successful, you will notice a new file named movie.jir is generated in your current working directory.
Let's register our jac program with Sentinel with following command.
sentinel register movie.jir -set_active true -mode ir
You will see the following output if the registering is successful.
jaseci > sentinel register movie.jir -set_active true -mode ir
[
  {
    "version": null,
    "name": "movie.jir",
    "kind": "generic",
    "jid": "urn:uuid:5b991fcd-037f-42d5-a81c-18ffdee29789",
    "j_timestamp": "2023-02-09T12:16:56.198160",
    "j_type": "sentinel",
    "code_sig": "c365a87b6c0fc87a6d37a7ef05d35cc2"
  },
  {
    "name": "root",
    "kind": "node",
    "jid": "urn:uuid:2cd39d7d-1749-4d91-aa37-319ec44fc4ca",
    "j_timestamp": "2023-02-09T12:16:56.198332",
    "j_type": "graph",
    "context": {}
  }
]
Note Sentinel is the overseer of walkers, nodes and edges. It is the abstraction Jaseci uses to encapsulate compiled walkers and archetype nodes and edges. The key operation with respect to sentinel is "register" a sentinel. You can think of registering a sentinel as a compiling your jac program. The walkers of a given sentinel can then be invoked and run on arbitrary nodes of any graph.
Three things are happening with above sentinel command:
We registered the jir we compiled earlier to new sentinel. This means this new sentinel now has access to all of our walkers, nodes and edges. -mode ir option specifies a jir program is registered instead of a jac program.
With -set_active true we set this new sentinel to be the active sentinel. In other words, this sentinel is the default one to be used when requests hit the Jac APIs, if no specific sentinels are specified.
Sentinel register has automatically creates a new graph (if no currently active graph) and run the init walker on that graph. This behavior can be customized with the options -auto_run and -auto_create_graph.
After registering the sentinel run one of the following two commands to get the sentinel ID.
sentinel get
or
sentinel list
The output will look something like this.
jaseci > sentinel get
{
  "version": null,
  "name": "summarization.jir",
  "kind": "generic",
  "jid": "urn:uuid:f710c843-f284-4782-9bfe-c50710d4907f",
  "j_timestamp": "2023-02-09T08:38:48.319842",
  "j_type": "sentinel",
  "code_sig": "42d0fb5666951a2784554fed01993853"
}
Note
sentinel getreturns the information about the current active sentinel, whilesentinel listreturns all available sentinels for the user.
The jid field is the ID for the sentinel. (jid stands for jaseci ID). So, now you got the Jaseci ID, and sentinal got registered now you can update it's jac program with following command.
sentinel set -snt JID -mode ir movie.jir
If it success, you'll get a output that looks like this:
jaseci > sentinel set -snt urn:uuid:f710c843-f284-4782-9bfe-c50710d4907f -mode ir movie.jir
{
  "response": "sentinel:generic:summarization.jir:urn:uuid:f710c843-f284-4782-9bfe-c50710d4907f registered and active!",
  "success": true
}
From this point you'll have to setup Jaseci Server, and Jaseci Studio Up and running. If you not installed them yet. Go to the preparation section and install it before going to next steps.
Now you have to log in the Jaseci Server from jsctl terminal with the credentials you have created while you creating super user. run the following in jsctl terminal.
login http://localhost:8000/
It will ask you for your username and password. You will see the following after a successful login.
jaseci > login http://localhost:8000/
Username: admin@jaseci.org
Password: admin
Login successful!
Note
Notice the @ symbol in front of the @jaseci > command line prompt. This indicates that your jsctl session is now logged into a jsserv instance, while jaseci > indicates it is in a local session.
While logged into the jsserv instance, you can register a sentinel on it with sentinel register command, just like how you were running it before in the local jsctl session
sentinel register movie.jir -set_active true -mode ir
Now open the Jaseci Studio and logging with the credentials as instructed in the previous section.
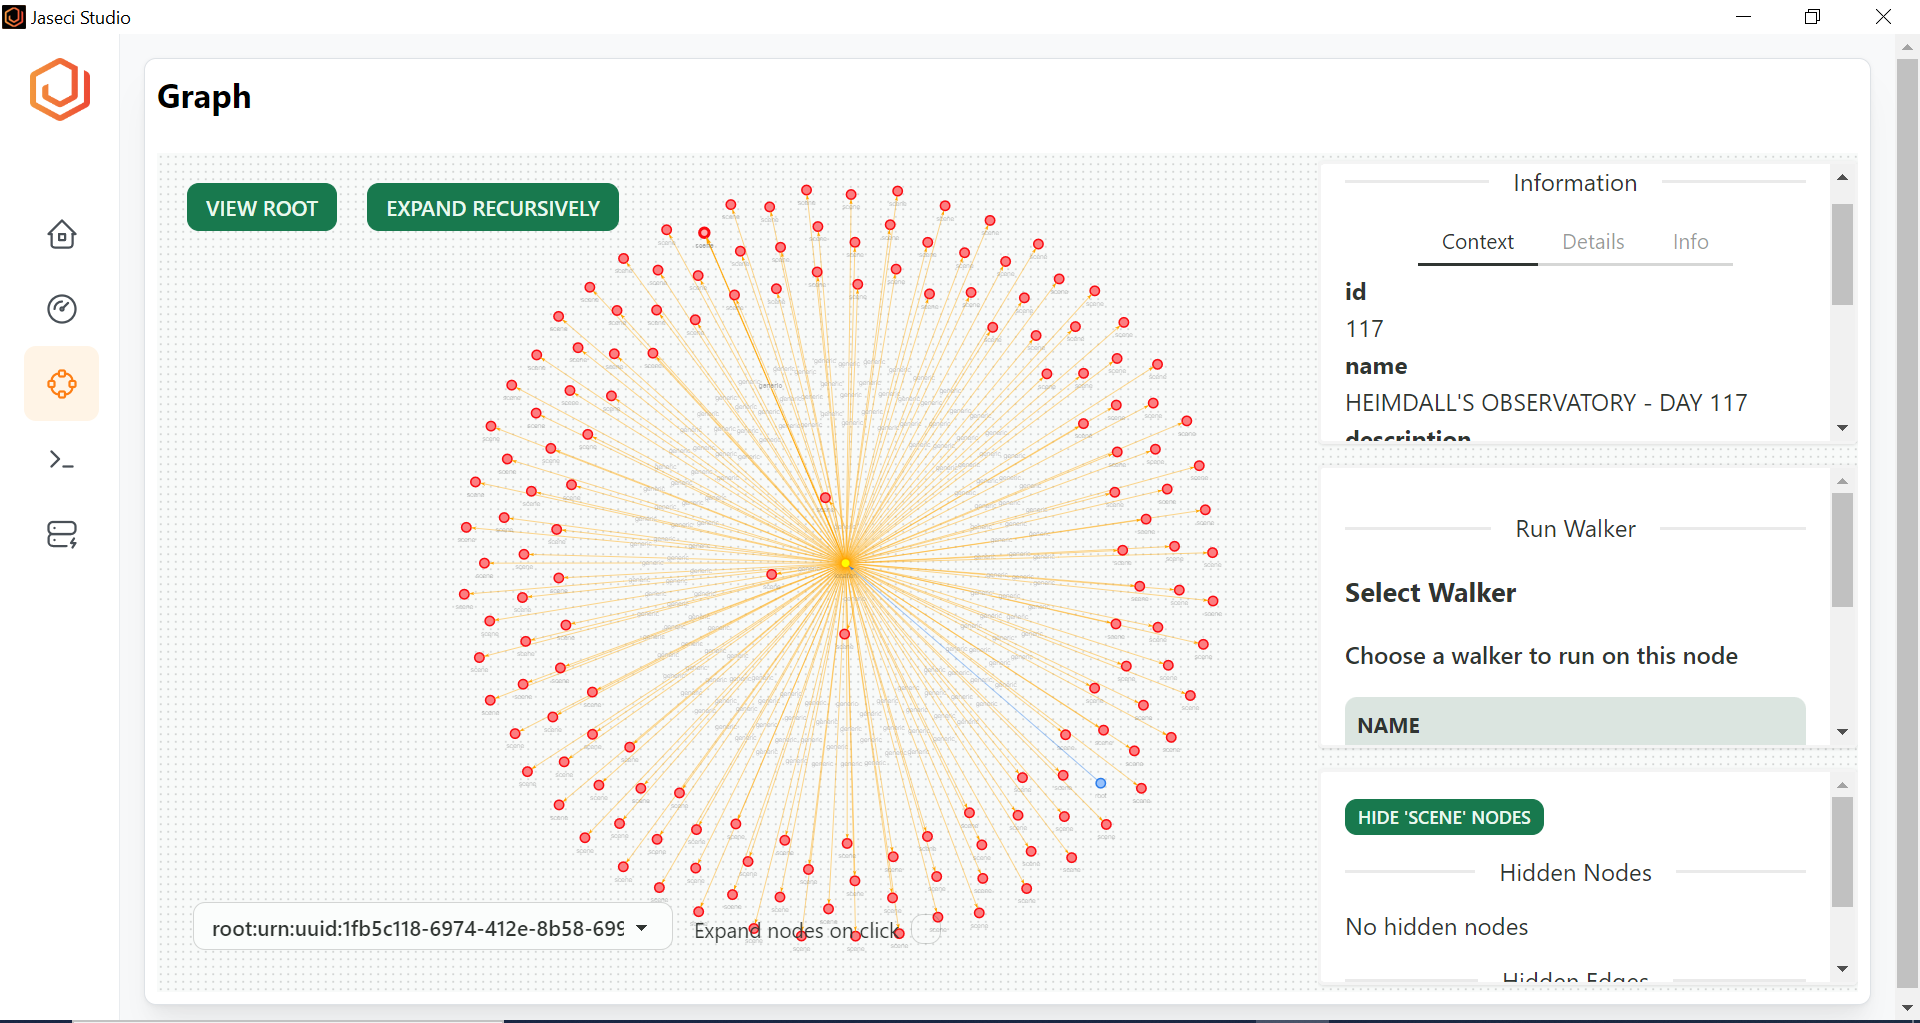
Goto the graph tab in the left side bar and select the uuid from the Select Graph drop down. You will see a beautiful output like this.
Click on the yellow color nodes and see ho actors and scene are connected.
The image below shows one instance of a scene node.
5. Ading Advance Features to the Graph
In order to get a clearer idea of the movie script, let's now add more features to the graph which we already created.
- The scene node contains three tags: "EXT," "INT," and "EXT./INT." The EXT tag denotes external scenes, whilst the INT tag denotes interior scenes.
- Moreover, the scene names contain an ID (an integer number) at the start of the name.
Lets reflect these information in the graph.
- Add another
nodecalled location;
node location{
    has location_name;
}
- Add ID attribute to the scene
node;
node scene{
    has id;
    has name;
    has description;
}
- Add an
edgeto connect actors to scenenode.
edge acts;
- Update build_graph
walker.
walker build_graph{
    can file.load_json;
    has movie = file.load_json("movie_data_sam.json");

    location_ext = spawn here ++> node::location(location_name="EXT");
    location_int = spawn here ++> node::location(location_name="INT");
    location_ext_int = spawn here ++> node::location(location_name="INT and EXT");

    for movie_scene in movie {
        _scene_name = movie_scene;
        content = movie[movie_scene];

        scene_tag = _scene_name.str::split(" ")[1];
        scene_id = _scene_name.str::split(" ")[0];
        scene_name = _scene_name.str::split("T.")[-1];

        if content.type == str:
            description = content;
            if scene_tag == "EXT.":
                scene = spawn location_ext ++> node::scene(id=scene_id, name=scene_name, description=description);
            elif scene_tag == "INT.":
                scene = spawn location_int ++> node::scene(id=scene_id, name=scene_name, description=description);
            else:
                scene = spawn location_ext_int ++> node::scene(id=scene_id, name=scene_name, description=description);

        if content.type == list:
            if content[0].type == str:
                description = content[0];
            if scene_tag == "EXT.":
                scene = spawn location_ext ++> node::scene(id=scene_id, name=scene_name, description=description);
            elif scene_tag == "INT.":
                scene = spawn location_int ++> node::scene(id=scene_id, name=scene_name, description=description);
            else:
                scene = spawn location_ext_int ++> node::scene(id=scene_id, name=scene_name, description=description);

            if content[1].type == dict:
                for _actor in content[1]{
                        name = _actor;
                        dialogue = content[1][_actor];

                        spawn scene +[acts]+>node::actor(name=name,dialogue=dialogue);
                    }
        }
- Here we are first spawning the location nodes from the roots node.
scene_id = _scene_name.str::split(" ")[0];is to extract the scene ID from the scene name.scene_tag = _scene_name.str::split(" ")[1];is to extract the scene tag from the scene name.- After these steps spawning scene nodes from the location node based on the scene tag.
Let's save these updated codes and refresh the graph in the Jaseci Studio.
Since we updated the code we have to build the code again using following code inside thejsctl terminal.
jac build movie.jac
Login in to the Jaseci server again and delete the existing graph created and recreate a empty graph using the following commands.
graph delete active:graph
graph create -set_active true
Run the sentinel register command;
sentinel register -set_active true -mode ir movie.jir
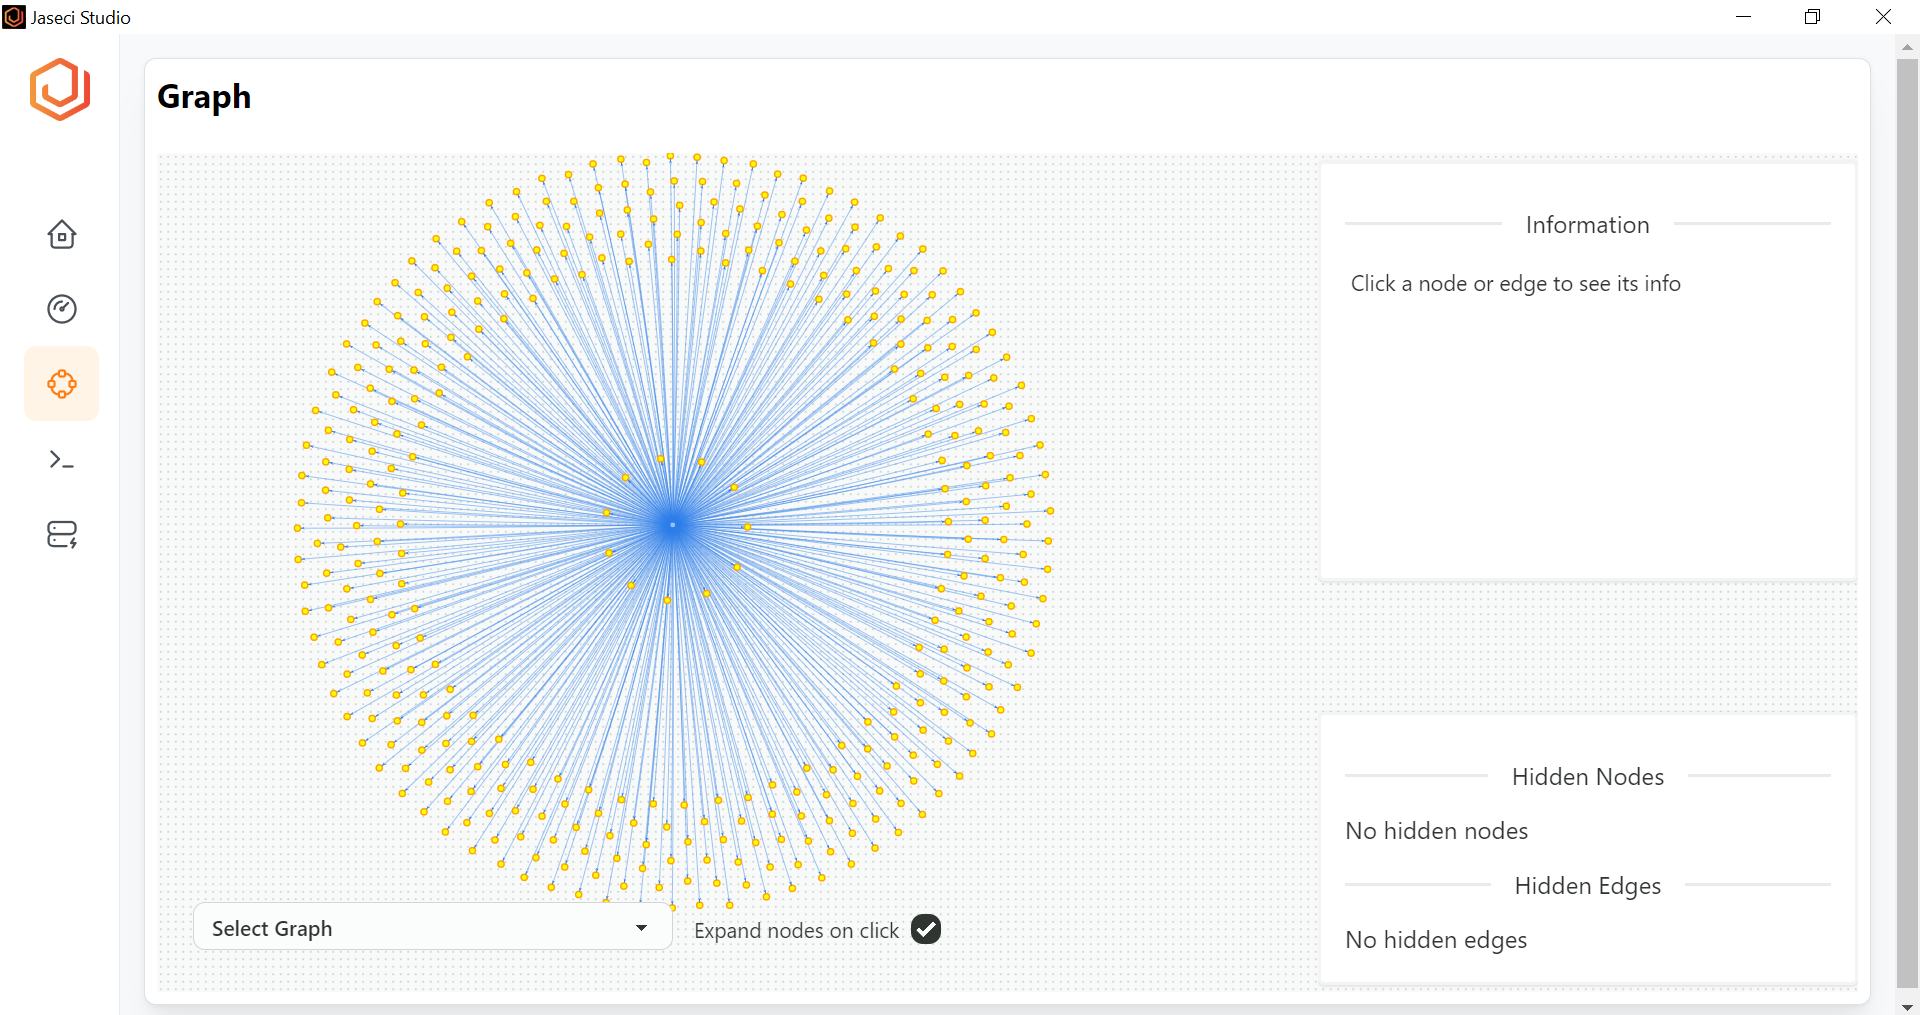
Login to the Jaseci Studio and view the refreshed graph. If everything is fine you should see a output similar to this;
This is how the initial view of the graph;

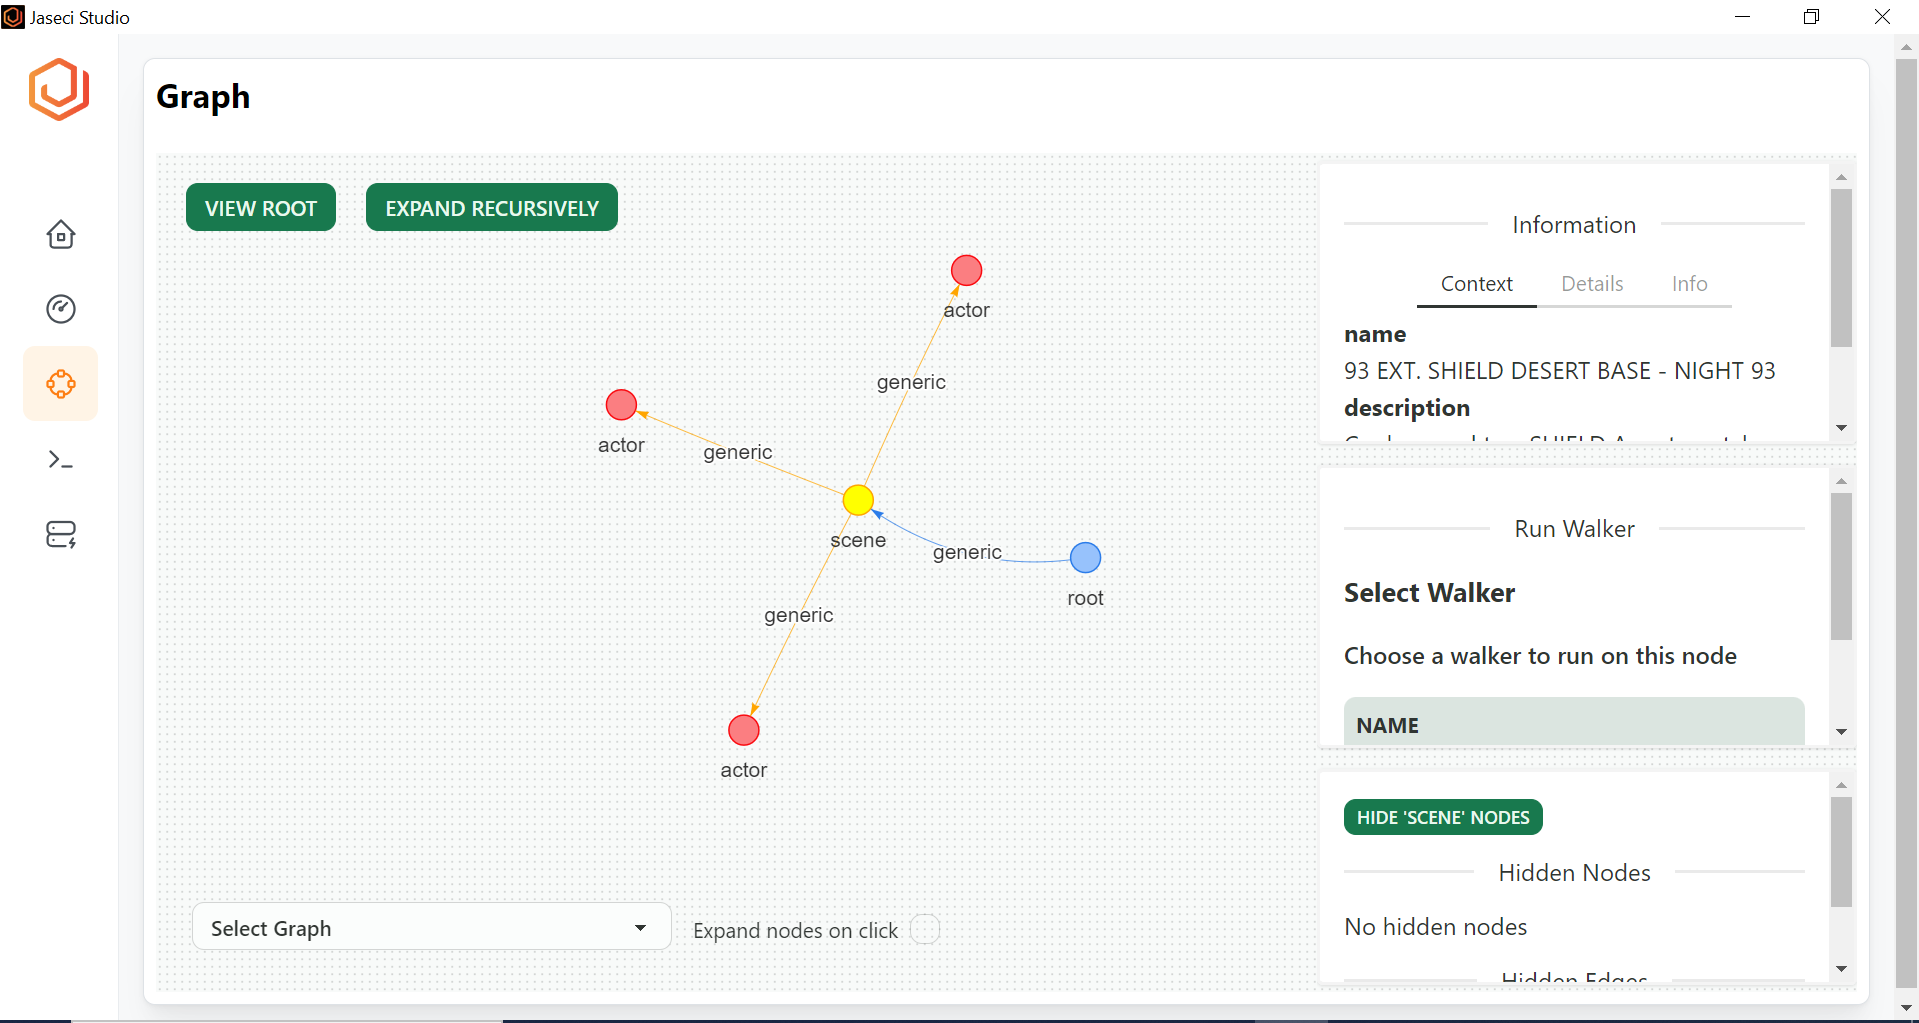
Example of location node;